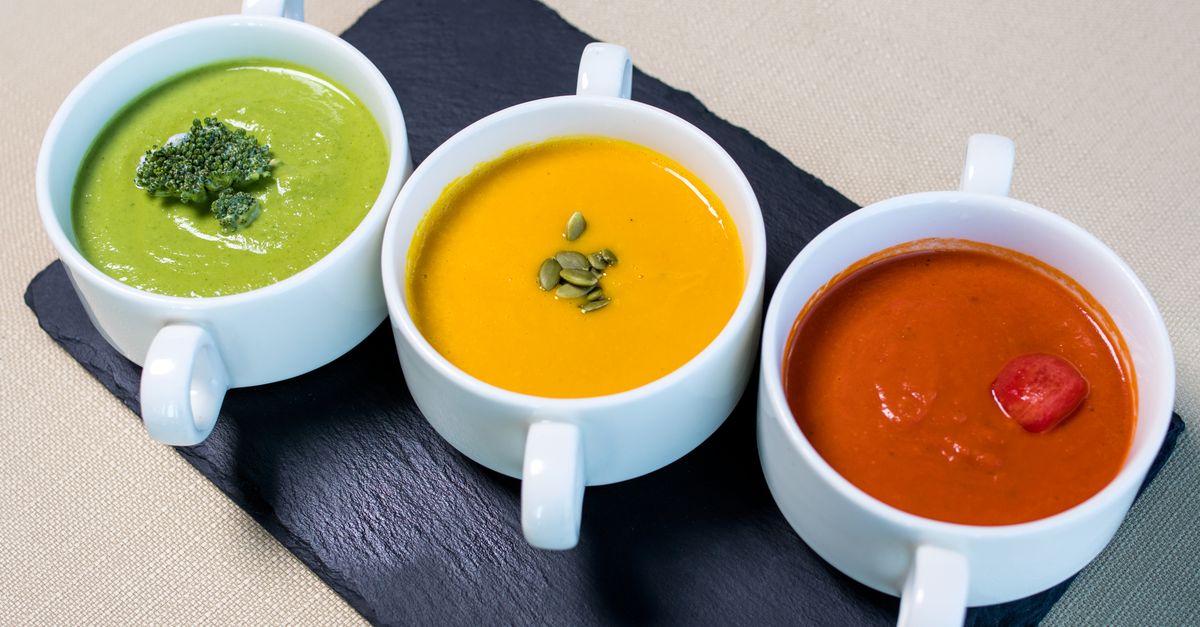
Why Your Homemade Soup is Bland (And The Flavor Secrets That Changed Everything For Me)
Are you staring into a pot of homemade soup, stirring dutifully, only to taste… well, nothing? A watery, underseasoned concoction that lacks the comforting depth you crave? You had visions of a rich, soul-warming broth brimming with vibrant flavors, but instead, you’ve got a bowl that tastes vaguely of boiled vegetables and regret. This was my life for years. I’d meticulously chop, simmer, and follow recipes, yet my soups consistently fell flat. They were fine, but never fantastic. They never had that elusive ‘umami’ or ‘depth’ that restaurant soups seemed to effortlessly achieve. It felt like I was missing some fundamental, whispered secret of soup-making.
I used to think it was about fancy ingredients or endlessly long simmering times. I’d buy expensive organic vegetables, religiously skim the foam, and let pots bubble for hours, only to be met with the same lackluster results. The frustration was real, especially when I’d invested so much time and effort. What I eventually realized, through countless culinary experiments and a deep dive into the science of flavor, was that the problem wasn’t the ingredients or the clock; it was a series of common, often overlooked mistakes in how those ingredients were handled and layered. These aren’t just ‘tips’; they are fundamental shifts in approach that transformed my soup game from bland to utterly brilliant.
Key Takeaways
- Stop boiling your aromatics and vegetables; instead, caramelize them deeply for a foundational layer of rich, complex flavor.
- Utilize the power of ‘fond’ by deglazing your pot, capturing browned bits that are flavor powerhouses.
- Layer your seasonings throughout the cooking process, not just at the end, to build depth from within.
- Incorporate acidic elements at the right time to brighten flavors and prevent soups from tasting flat.
The Fatal Flaw: Boiling Aromatics Instead of Caramelizing Them
The single biggest mistake I made for years, and one I see most often in home kitchens, is essentially boiling the initial vegetables, especially aromatics like onions, carrots, and celery. A recipe might say “sauté until softened,” and most people will dutifully do so over medium heat for 5-7 minutes until they’re translucent. This is a missed opportunity of colossal proportions. Softened vegetables are fine, but caramelized vegetables are flavor gold.
Think about it: caramelization is the process of browning sugars, creating hundreds of new flavor compounds that are sweet, nutty, and deeply complex. When you just soften vegetables, you’re missing out on this entire spectrum of flavor. What changed everything for me was embracing deep caramelization. Instead of 5-7 minutes, I now aim for 15-20 minutes (or even 30, depending on the volume) over medium-low heat. This means:
- More fat, lower heat: Don’t be shy with the olive oil or butter. It helps conduct heat evenly and prevents sticking. Start with medium heat to get things going, then reduce to medium-low. This allows the sugars to develop slowly without burning.
- Patience is paramount: Resist the urge to constantly stir. Let the vegetables sit undisturbed for several minutes until a rich, golden-brown crust forms on the bottom before stirring and repeating. You’re building layers of flavor right there in the pot.
- Color, not just softness: You’re looking for deep golden-brown, almost mahogany, on those onions, carrots, and celery. They should be significantly reduced in volume, sweet, and intensely flavorful on their own. This creates the foundational sweetness and complexity that will permeate your entire soup. In my experience, this alone adds about 70% of the missing depth most home cooks crave.
For example, when making a lentil soup, I used to just soften my mirepoix (onions, carrots, celery). Now, I take 20 minutes to get them deeply caramelized. The difference is night and day – the soup goes from tasting like lentils with some vegetables to a rich, earthy, naturally sweet symphony. This deep browning forms the very backbone of your soup’s flavor profile. It’s not just a step; it’s the step.
The Unsung Hero: Leveraging “Fond” for Maximum Umami
Following deep caramelization, you’ll notice those delicious brown bits sticking to the bottom of your pot. This isn’t burnt food; this is fond – a French culinary term for the concentrated, caramelized juices and proteins left behind after searing or sautéing. Fond is an absolute flavor bomb, packed with umami and complexity. To leave it in the pot is to leave significant flavor on the table, literally.
Many home cooks move directly from sautéing vegetables to adding broth, effectively leaving this treasure trove behind or, worse, letting it burn. The secret is deglazing. After your aromatics are beautifully caramelized and any other initial ingredients (like browned meat or spices) have been added, pour in a splash of liquid. This could be wine, beer, broth, or even water. The key is to scrape up all those browned bits with a wooden spoon, incorporating them into the liquid. This process immediately infuses your soup base with a depth of flavor that would otherwise be lost.
- Timing is crucial: Deglaze before adding the bulk of your liquid. This ensures the concentrated flavors are evenly distributed. If you’re adding tomato paste or spices, do that before deglazing, letting them toast briefly to unlock their full potential, then deglaze over them.
- Alcohol for extra punch: If the recipe allows, use a dry wine (red for beef, white for chicken or vegetable) for deglazing. The alcohol helps extract fat-soluble flavors and then cooks off, leaving behind only deliciousness. If not, a little extra broth works perfectly.
I remember making a mushroom barley soup that always tasted… mushroomy, but flat. Once I started deeply browning the mushrooms and then deglazing the fond with a splash of sherry before adding broth, it transformed into this incredibly earthy, savory experience. That fond was the missing puzzle piece for a truly robust flavor.
The Layering Principle: Seasoning Throughout, Not Just at the End
Most people, myself included in my early cooking days, treat seasoning as an afterthought. You add salt and pepper at the very end, taste, adjust, and call it a day. While a final seasoning adjustment is vital, it’s not enough. Salt isn’t just a flavor; it’s a flavor enhancer. When added throughout the cooking process, it penetrates ingredients, drawing out their natural flavors and building complexity from the inside out.
Think of it like building a house. You don’t just paint the outside at the end; you build the foundation, the walls, the roof, layering materials. Flavor is the same. Each stage of cooking offers an opportunity to build a new layer of seasoning. This doesn’t mean oversalt; it means thoughtfully season.
- Season as you go: When you caramelize your aromatics, add a pinch of salt. When you brown meat, season it generously. When you add spices, salt helps bloom their flavors. This ensures that every component of your soup is seasoned to its core, rather than relying on surface-level seasoning at the end.
- Consider different salts: While most recipes call for kosher salt, don’t be afraid to experiment. A sprinkle of flaky sea salt at the very end can add textural intrigue, while fine sea salt is excellent for seasoning during cooking because it dissolves quickly.
- Spices need blooming: Don’t just dump dried spices into liquid. Sauté them briefly with your aromatics (after they’ve caramelized and you’ve deglazed, or before deglazing if there’s enough oil) for 30-60 seconds until fragrant. This ‘blooming’ in fat releases their fat-soluble flavor compounds, making them far more potent and flavorful than if just added to broth.
For a long time, my chicken noodle soup tasted like boiled chicken and noodles. It wasn’t until I started salting the chicken thighs before browning, seasoning the mirepoix as it caramelized, and blooming the bay leaf and thyme in a little oil before adding broth, that it finally developed that rich, savory, deeply comforting taste I remembered from my grandmother’s kitchen. It’s about building flavor from the ground up.
The Brightening Touch: Acids Are Not Just for Salads
This was a revelation for me. I used to think of acids (vinegar, lemon juice, tomatoes) as ingredients for salads or marinades, not for soup. But a lack of acidity is a common culprit behind a bland, one-note soup. Just like salt, acid doesn’t just add sourness; it brightens and balances flavors, preventing a soup from tasting heavy or flat. It wakes up the palate and makes other flavors pop.
Imagine a perfectly seasoned dish that still feels a little… dull. A squeeze of lemon or a splash of vinegar can transform it, adding a vibrant spark. In soup, this is even more critical. Acidity cuts through richness, enhances freshness, and provides that crucial contrast that elevates a dish from good to great. The trick is knowing when and what kind to use.
- Finish with a flourish: Often, a final splash of lemon juice or a good quality vinegar (like apple cider, red wine, or balsamic, depending on the soup) right before serving is all it takes. Start small, taste, and add more if needed. This fresh acid brightens everything without making the soup taste overtly sour.
- Incorporate earlier for depth: Tomatoes (paste or crushed) are fantastic sources of acidity and umami. Sautéing tomato paste until it darkens slightly and caramelizes before adding liquids enhances its flavor and deepens the color of your soup. For cream-based soups, a little white wine or even a small amount of crème fraîche can add a subtle tang.
My cream of mushroom soup used to be rich but a bit…gloopy and heavy. A friend suggested a tiny squeeze of lemon juice at the end. I was skeptical, but it completely transformed it, adding a lift that made it feel lighter and far more flavorful, cutting through the richness beautifully. Now, I consider acid an indispensable tool in my soup-making arsenal.
The Overlooked Power of Proper Simmering and Reduction
Finally, while long simmering alone won’t fix a bland foundation, proper simmering and strategic reduction can concentrate and meld the flavors you’ve painstakingly built. This isn’t about just letting it bubble; it’s about controlling the heat to achieve the desired effect.
A rolling boil will quickly evaporate liquid, but it can also break down delicate ingredients and lead to a cloudy broth. A gentle simmer, where only a few bubbles break the surface, allows flavors to slowly develop and mingle without scorching or overcooking.
- Gentle does it: Once all your ingredients and liquid are in the pot, bring it to a boil, then immediately reduce the heat to a bare simmer. This allows the flavors to integrate slowly. Skim any foam that rises to the surface during the initial boil – this can contribute to off-flavors.
- Strategic reduction: If your soup tastes a bit too watery even after building all these flavor layers, let it simmer uncovered for a period. As the water evaporates, the flavors will concentrate, leading to a richer, more intense broth. This is particularly effective for broths and consommés. However, be mindful not to reduce too much if your soup contains delicate vegetables that can turn to mush.
I once made a French onion soup that, despite caramelized onions, still felt a bit thin. I realized I hadn’t allowed it enough time to gently simmer and reduce. The next time, after assembling everything, I let it simmer uncovered for 30 minutes longer than the recipe suggested. The result? A deeply savory, unctuous broth that was leagues beyond my previous attempts. It was a testament to the fact that while good ingredients and technique lay the groundwork, time and careful heat management polish the final product.
Frequently Asked Questions
Q: How do I know if I’ve caramelized my vegetables enough for soup?
A: You’re looking for a deep, even golden-brown color on the surface of the vegetables, especially the onions. They should be significantly reduced in volume and have a visibly softer, almost jam-like texture. The bottom of the pot should have a noticeable layer of brown ‘fond’. Don’t be afraid to let them go darker than just translucent – that’s where the real flavor is hiding. It’s often longer than you think, 15-30 minutes on medium-low heat, depending on the quantity.
Q: Can I deglaze with just water if I don’t have wine or broth?
A: Absolutely! While wine or broth can add extra layers of flavor, water will still effectively lift the fond from the bottom of the pot, allowing you to incorporate those concentrated flavors into your soup base. The mechanical action of scraping is more important than the specific liquid in this step.
Q: How much salt should I add throughout the cooking process without oversaltin g?
A: This is where tasting as you go is critical. Add small pinches (about 1/4 to 1/2 teaspoon) at each major stage (browning meat, caramelizing aromatics, blooming spices). When you add the main liquid, season it lightly, knowing you’ll adjust more at the end. Remember that salt will penetrate the ingredients over time. It’s always easier to add more salt than to remove it, so err on the side of caution and build up gradually.
Q: What types of acidic ingredients are best for brightening soup?
A: Lemon juice is a universal brightener, excellent for most soups. Different vinegars (red wine, white wine, apple cider, balsamic) can add specific flavor notes – choose one that complements your soup’s profile. Tomatoes (paste, diced, or crushed) add both acidity and umami. A dollop of yogurt or sour cream (for creamy soups) can also provide a pleasant tang. The key is to add small amounts, taste, and adjust until the flavors ‘pop’.
Q: Does a longer simmer always mean a better soup?
A: Not necessarily. While gentle simmering helps meld and concentrate flavors, an excessively long simmer can overcook vegetables, making them mushy, or cause delicate flavors to dissipate. The optimal simmering time depends on the ingredients and desired consistency. Focus on building the foundational flavors first (caramelization, fond, layered seasoning), and then simmer gently until ingredients are tender and flavors are well-integrated, which is usually 30 minutes to an hour after adding liquid, beyond the initial reductions.
Learning these flavor secrets transformed my homemade soups from merely acceptable to genuinely crave-worthy. It’s not about magic; it’s about understanding how to coax the most profound, most delicious flavors out of every ingredient at every stage of the cooking process. Stop accepting bland soups and start layering in that irresistible depth today. Your taste buds, and anyone you cook for, will thank you.
Written by Marcus Thorne
Productivity & Habit Formation
With a background in behavioral psychology research, Marcus is passionate about uncovering the science behind effective daily habits.
You Might Also Like

A Beginner's Guide to Adjusting Home Network DNS Settings
Unlock faster, more secure internet at home by learning to adjust your DNS settings. This guide simplifies the process for beginners.

Seven Years Without a Clothes Dryer: My Unexpected Revelations on Laundry and Lifestyle
After seven years without a clothes dryer, I share my unexpected lessons on energy savings, garment longevity, and simplifying laundry day.
Six Months Without a Microwave: My Unexpected Kitchen Shift
Discover my journey without a microwave and how it unexpectedly transformed my cooking habits, food quality, and kitchen efficiency.