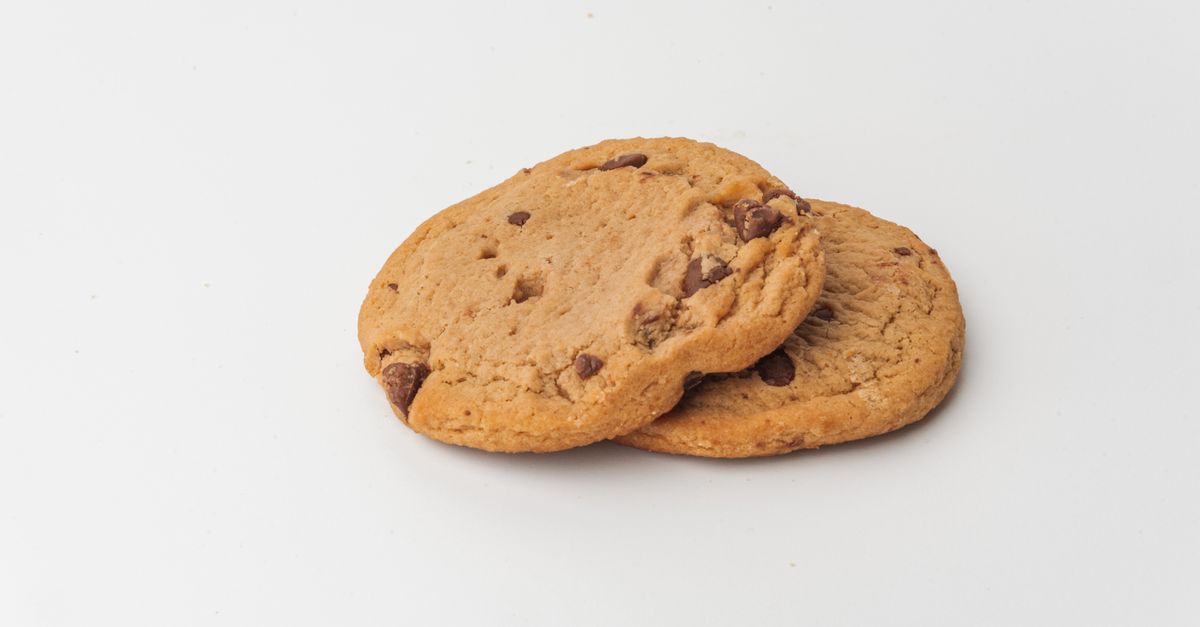
Why Your Homemade Cookies Are Flat, Not Chewy (And The Simple Shifts That Guarantee Puffy, Soft Perfection)
There’s nothing quite like the dream of pulling a tray of perfectly plump, soft, and chewy cookies from the oven. You picture those golden-brown edges giving way to a rich, melt-in-your-mouth interior, perhaps with a slight chew in the middle. But for many home bakers, myself included for years, that dream often crumbles into a nightmare of thin, crispy, flat discs. You follow the recipe meticulously, use fresh ingredients, and yet, time after time, your cookies spread out into oblivion, losing all their desirable chew and softness.
I remember countless batches where I’d meticulously measured flour, softened butter, and chilled dough, only to be met with disappointment. My chocolate chip cookies, which should have been thick and gooey, were instead fragile wafers. My snickerdoodles, meant to be pillowy and tender, were crunchy and brittle. It was frustrating, and for a long time, I blamed my oven, my recipe, or even my baking sheets. What I eventually learned, after much experimentation and more than a few ruined batches, was that the problem wasn’t a single culprit, but a series of subtle, interconnected elements that most recipes gloss over. Mastering the truly chewy cookie isn’t about one magic trick; it’s about understanding the delicate dance of ingredients, temperature, and technique.
Key Takeaways
- Adjust your butter’s temperature and creaming technique for optimal aeration and structure.
- Ensure precise flour measurement and consider a higher protein flour for better gluten development.
- Control oven temperature and baking time meticulously to prevent over-spreading and over-browning.
- Experiment with different sugar ratios and types to influence moisture and chewiness.
The Butter Paradox: Creaming for Structure, Not Just Sweetness
Most recipes tell you to ‘cream butter and sugar until light and fluffy.’ While technically correct, the state of your butter and the duration of creaming are far more critical than you might imagine for achieving that desired puff and chew. For years, my butter was either too cold (leading to a crumbly, underdeveloped dough) or too warm (resulting in an oily, flat mess). The sweet spot, in my experience, is butter that’s cool to the touch but yields slightly when pressed – around 65-68°F (18-20°C). This allows it to hold air effectively without melting too quickly.
The real game-changer for me was not over-creaming the butter and sugar. While volume is good, whipping too much air into too warm butter creates an unstable emulsion. When the butter melts in the oven, that excess air quickly escapes, causing the cookie to collapse and spread. Instead, aim for a cohesive mixture that’s visibly lighter in color and slightly fluffy, but don’t go for five minutes. For typical room-temperature butter and granulated sugar, 2-3 minutes at medium speed is often sufficient. What you’re looking for is just enough aeration to create pockets that will expand and set, giving your cookie lift without premature collapse. This seemingly small adjustment drastically improved the structure and chewiness of my cookies.
The Flour Factor: Precision and Protein Matter More Than You Think
Flour isn’t just a filler; it’s the structural backbone of your cookie. The two most common mistakes I see (and made myself) are imprecise measurement and underestimating the impact of flour type. First, never scoop flour directly from the bag with your measuring cup. This compacts the flour, adding significantly more than the recipe intends. Instead, spoon the flour into your measuring cup and level it off with the back of a knife. This spoon and level method can make a difference of up to 25% less flour per cup, which directly impacts the spread.
Beyond measurement, consider the protein content. All-purpose flour typically works, but for a truly chewy cookie with a slight internal tug, a slightly higher protein flour can make a difference. I often use a blend of all-purpose flour and a small amount of bread flour, or sometimes just an unbleached all-purpose flour (which often has a marginally higher protein content than bleached varieties). The extra protein in bread flour contributes to stronger gluten development, giving the cookie more structure and resilience, preventing it from spreading excessively. It’s a subtle but powerful lever in achieving that perfect chew.
Temperature Control: The Oven’s Hidden Influence on Spread
You might think your oven temperature is just a number, but it plays a profound role in how quickly your cookies set. An oven that’s too low or fluctuates widely allows the butter in your dough more time to melt before the flour and eggs have a chance to set the cookie’s structure. This leads to excessive spreading and those dreaded flat discs. Always preheat your oven for at least 20-30 minutes after it signals it’s reached temperature. This ensures the oven cavity, including the walls and racks, is thoroughly heated and stable. I also highly recommend an oven thermometer; I’ve found my oven to be consistently 25-50°F (14-28°C) off from its display, which was a huge revelation.
Another critical, often overlooked aspect is the temperature of your cookie dough itself. Chilling your dough for at least 30 minutes, and ideally several hours or overnight, is crucial. Cold butter takes longer to melt, giving the cookie structure time to form. I’ve even started freezing my scooped dough balls for 10-15 minutes right before baking. The cold dough hits the hot oven, the edges begin to set, and the center slowly cooks, resulting in a thicker, chewier cookie with those lovely slightly crisp edges and a soft interior. This thermal shock is a simple, effective way to control spread.
The Sugar Science: Ratio and Type for Optimal Moisture and Texture
Sugar does more than just sweeten; it’s a key player in cookie texture, influencing spread, chewiness, and moisture. For a soft, chewy cookie, the ratio of brown sugar to granulated sugar is paramount. Granulated sugar encourages spread and crispiness, as it melts quickly and has less moisture. Brown sugar, on the other hand, contains molasses, which is hygroscopic (attracts and retains moisture). This extra moisture and slight acidity contribute significantly to a chewier, softer texture and can limit excessive spread.
My go-to formula for a truly chewy cookie now uses at least a 1:1 ratio of brown sugar to granulated sugar, often leaning more heavily on brown sugar. If a recipe calls for equal parts, I might do 60% brown and 40% granulated. The molasses in brown sugar also aids in browning, giving your cookies that desirable golden hue without overbaking. It’s a subtle adjustment, but one that drastically improves the final texture, keeping them soft and pliable for days longer than their granulated-sugar-heavy counterparts.
Understanding Leavening: Baking Soda vs. Baking Powder
Leavening agents are crucial for lift, but their specific roles profoundly impact texture. Baking soda (sodium bicarbonate) needs an acid to react and produce carbon dioxide bubbles. Common acids in cookies are brown sugar (molasses), buttermilk, or chocolate (cocoa powder). It creates a tender crumb and contributes to spread.
Baking powder, on the other hand, is usually double-acting, meaning it reacts once with moisture and again with heat. It provides more consistent lift upwards and creates a cakier, softer texture. For a chewy cookie with good height, I’ve found that a combination of both baking soda and a touch of baking powder works best. The baking soda helps with spread and tenderness, while the baking powder provides that initial upward lift and softer crumb. If your cookies are spreading too much, an imbalance in leavening, particularly too much baking soda or not enough acid, could be the culprit. A slight reduction in baking soda or increasing acidic components can help rein in the spread.
The Right Baking Surface and Timing: Setting the Stage for Success
The surface you bake on and how long you bake are the final touches that determine success. Avoid dark non-stick baking sheets; they absorb more heat and can cause the bottoms of your cookies to brown too quickly, leading to a crispy, dry result. Instead, opt for light-colored aluminum baking sheets. For even heat distribution and to prevent flat bottoms, I always use parchment paper or silicone baking mats. They provide a buffer against direct heat and make clean-up a breeze.
Lastly, pull your cookies from the oven when they look slightly underdone in the center. The edges should be set and golden, but the very center might still look a little pale and soft. They will continue to cook and set on the hot baking sheet from residual heat (carryover cooking). Letting them cool for 5-10 minutes on the sheet before transferring to a wire rack is crucial. This allows the internal structure to firm up, preserving that soft, chewy interior. Overbaking by even a minute or two can turn a perfectly chewy cookie into a hard, brittle one. Trust your instincts and the visual cues; it’s better to underbake slightly for chewiness than to overbake for crispness.
Frequently Asked Questions
Q: My cookies are always flat. What’s the single most impactful change I can make?
A: The most impactful change is often controlling your butter temperature and creaming technique. Ensure butter is cool to the touch but pliable, and don’t over-cream. Chill your scooped dough thoroughly before baking for at least 30 minutes, or even an hour. This slows down butter melting, allowing the cookie structure to set before excessive spreading occurs.
Q: Does the type of sugar really matter for chewiness?
A: Absolutely. Brown sugar, with its molasses content, contributes significantly more moisture and chewiness than granulated sugar. A higher ratio of brown sugar to granulated sugar (e.g., 60% brown, 40% granulated) is crucial for a soft, chewy cookie that stays fresh longer.
Q: My oven runs hot/cold. How can I account for this?
A: Invest in an inexpensive oven thermometer and place it inside your oven. Bake with this thermometer as your guide, adjusting your oven’s dial up or down to hit the target temperature. Preheating your oven for at least 20-30 minutes beyond the initial ‘ready’ signal also helps stabilize the temperature.
Q: Should I use baking soda or baking powder for chewy cookies?
A: For the best chewy texture with good lift, a combination is often ideal. Baking soda reacts with acidic ingredients (like brown sugar or chocolate) for tenderness and some spread, while baking powder provides more upward lift for a softer, slightly cakier crumb. Many recipes for chewy cookies will use both.
Q: How long should I chill my cookie dough?
A: For optimal chewiness and reduced spread, chilling your dough for at least 30 minutes is recommended. However, I’ve found chilling for several hours or even overnight, and then briefly freezing scooped dough balls for 10-15 minutes right before baking, yields the best results. The colder the dough, the slower the butter melts, allowing for better structure to form.
By carefully considering each of these elements – from the precise temperature of your butter to the subtle nuances of leavening and baking time – you can transform your flat, crispy cookie woes into a triumph of perfectly puffy, soft, and impossibly chewy homemade delights. It’s a journey of understanding the science behind the bake, but the reward of that perfect cookie is more than worth it.
Written by Evelyn Reed
Mindfulness & Personal Well-being
A former editor for a prominent lifestyle magazine, Evelyn brings a keen eye for compelling narratives and practical advice to our team.
You Might Also Like

A Beginner's Guide to Adjusting Home Network DNS Settings
Unlock faster, more secure internet at home by learning to adjust your DNS settings. This guide simplifies the process for beginners.

Seven Years Without a Clothes Dryer: My Unexpected Revelations on Laundry and Lifestyle
After seven years without a clothes dryer, I share my unexpected lessons on energy savings, garment longevity, and simplifying laundry day.

Six Months Without a Microwave: My Unexpected Kitchen Shift
Discover my journey without a microwave and how it unexpectedly transformed my cooking habits, food quality, and kitchen efficiency.